TradingView has become an indispensable tool for traders around the world, and one of its most powerful 💪 features is the heatmap.
As someone who has been using TradingView for an extended period, I want to share my personal experiences and insights on how TradingView’s heatmaps have transformed the way I approach the financial markets.💹
Table of Contents
📌Chapter 1: The Early Days
I remember the days when I first stumbled upon TradingView. Back then, I was a novice trader, struggling to make sense of the ever-changing market dynamics.

TradingView’s sleek interface and user-friendly design immediately caught my attention, but it was the heatmap that truly piqued my interest.
In the beginning, I used heatmaps primarily to monitor the market sentiment and identify potential trading opportunities.
The heatmap provided a visual representation of price movements, making it easier for me to spot trends, clusters of activity, and areas of interest. I quickly realized that this tool could be a game-changer in my trading journey.
⤴️Chapter 2: The Learning Curve
As with any new tool, there was a learning curve. I spent hours exploring the different features and customization options that TradingView’s heatmaps had to offer. From adjusting the timeframes to selecting specific instruments, the possibilities were endless.
One key aspect I embraced was the ability to focus on specific asset classes, such as forex, stocks, or cryptocurrencies, depending on my trading preferences.
🪜Step-by-Step Guide: Mastering the Art of Market Analysis with TradingView’s Heatmap
TradingView’s heatmaps allowed me to tailor my trading experience, helping me stay ahead of the curve in the ever-evolving financial markets.
Step 1: Access TradingView
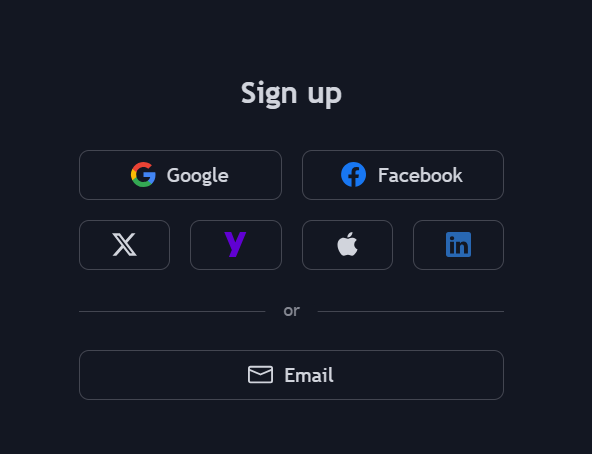
- Create or Log In to Your Account: If you don’t already have a TradingView account, you’ll need to create one. Visit the TradingView website and sign up. If you already have an account, simply log in.
Step 2: Navigate to the Heatmap Section
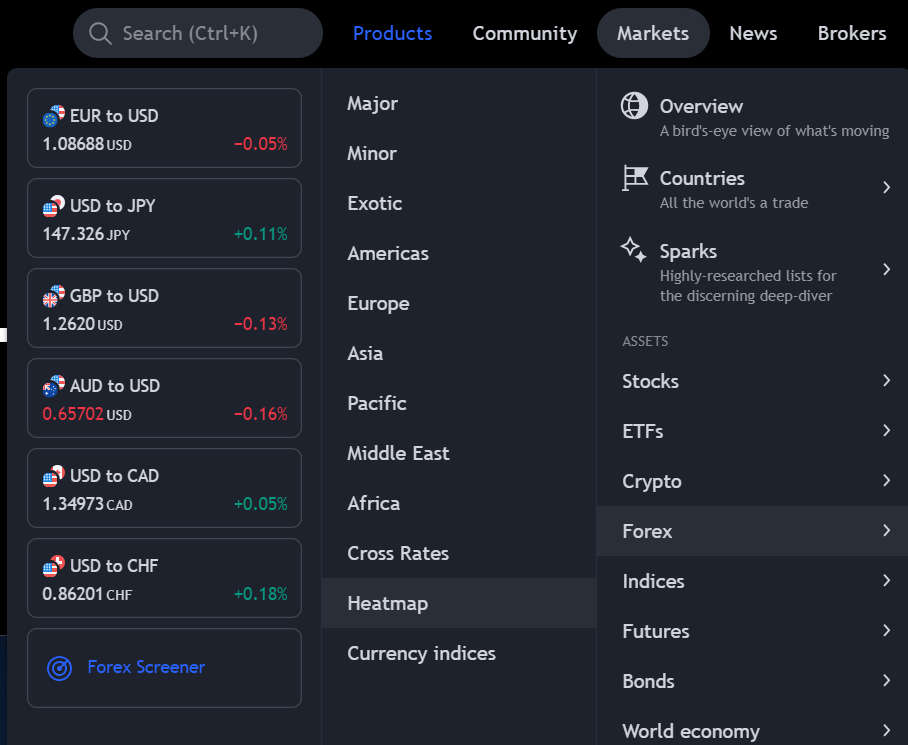
- Find the Heatmap Tool: Once logged in, navigate to the ‘Markets’ section on the top menu. Under this, you’ll find a submenu where you can select ‘Heatmap’. Click on it to access the heatmap tool.
Step 3: Choose Your Market
- Select the Market: TradingView offers heatmaps for various markets such as stocks, forex, cryptocurrencies, etc. Select the market you’re interested in analyzing.
Step 4: Customize Your View
- Adjust Time Frames and Settings: Depending on your trading strategy, select the appropriate time frame (e.g., daily, weekly, monthly). You can also customize other settings like the color scheme, what data the colors represent (e.g., price change, volume), and more.
Step 5: Apply Filters
- Use Filters for Specific Analysis: If you’re interested in a specific sector, market cap range, or other criteria, use the filters to tailor the heatmap to show only the relevant data. This step is crucial for focusing your analysis on the segments that align with your trading strategy.
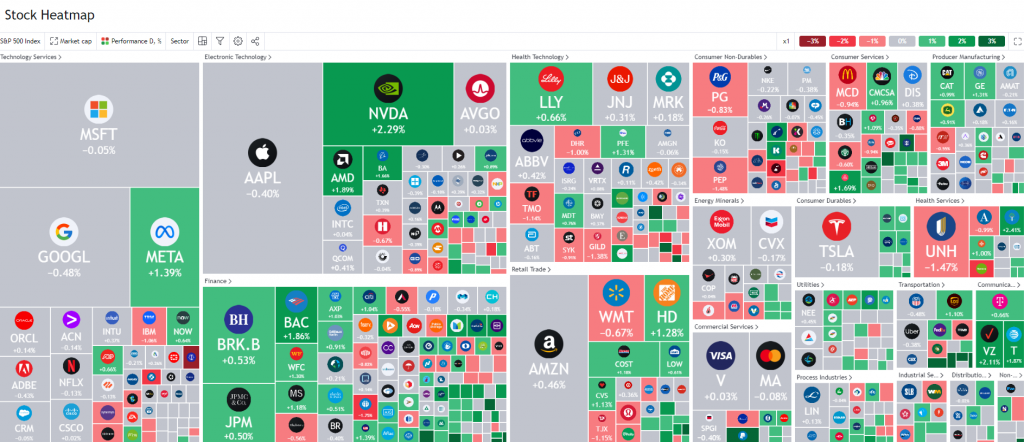
Step 6: Analyze the Heatmap
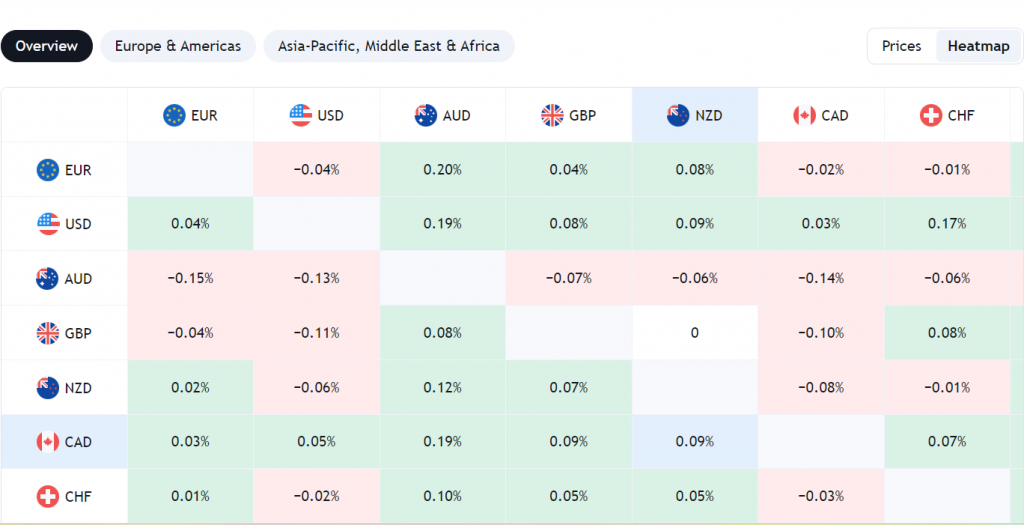
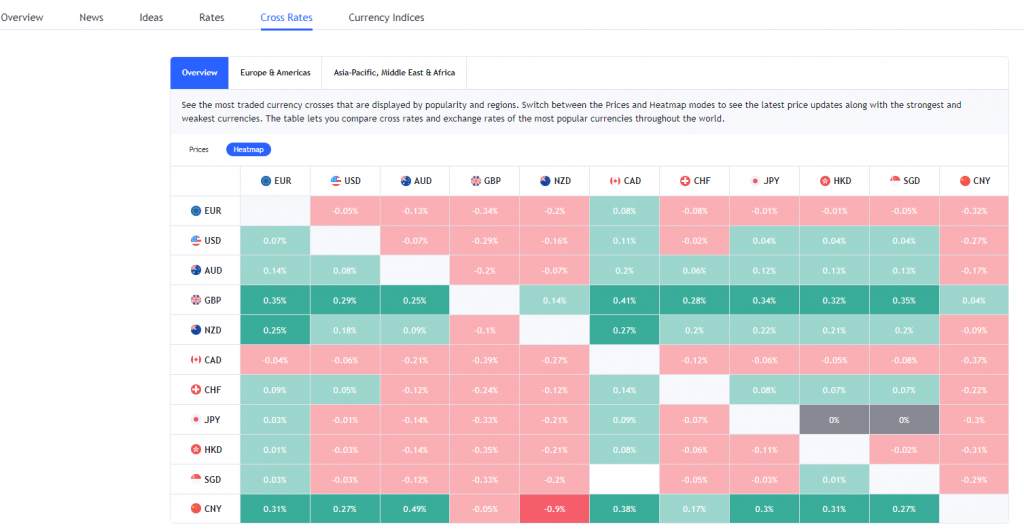
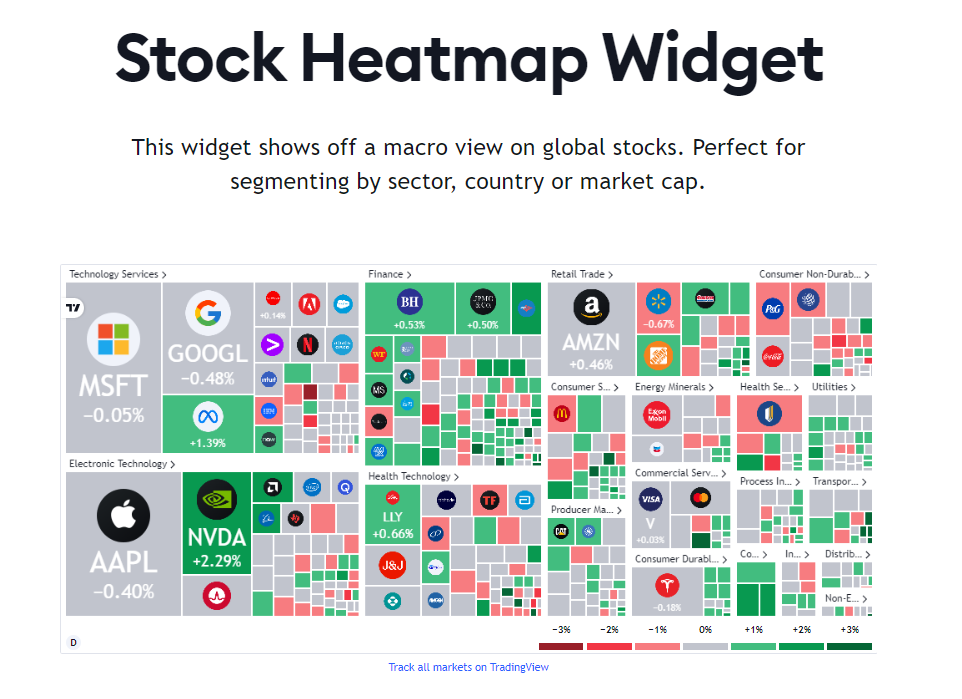
- Interpret the Colors and Patterns: Analyze the heatmap by looking at the color patterns. Typically, green represents positive movement, while red indicates negative movement. The intensity of the color often shows the strength of the movement. Hover over individual elements for detailed information.
Step 7: Dive Deeper into Individual Stocks or Sectors
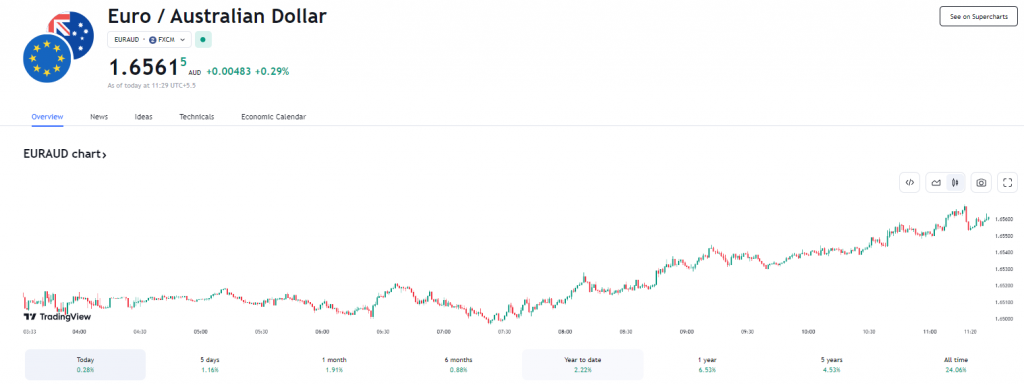
- Further Analysis: If a particular stock or sector catches your eye, click on it for more detailed information. This can include charts, news, fundamental data, etc., helping you make a more informed decision.
Step 8: Integrate with Other Tools
- Combine with Other TradingView Tools: For a more comprehensive analysis, integrate the insights from the heatmap with other TradingView tools like charts, technical indicators, and fundamental analysis tools.
Step 9: Set Alerts and Monitor
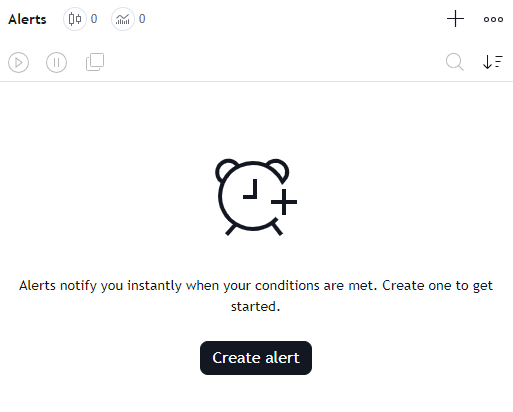
- Set Custom Alerts: Utilize TradingView’s alert system to get notified about significant changes in the stocks or sectors you are monitoring. This helps you stay updated without constantly watching the heatmap.
Step 10: Keep Learning and Adjusting
- Continuously Learn: Explore TradingView’s educational resources and community discussions to learn more about using heatmaps effectively. Adjust your approach as you gain more experience and as market conditions change.
Quick Links:
- How To Do Paper Trading On TradingView: Complete Guide For Beginners
- TradingView Discount Code: Upto 70% off [Latest]
📌Chapter 3: Unleashing the Power of Color
The color-coded heatmaps in TradingView were a revelation. Each color represented a different level of market activity, ranging from cool blue (low activity) to fiery red (high activity). This visual representation made it effortless to gauge the intensity of trading in real time.
I discovered that by keeping a close eye on the heatmaps, I could spot potential breakouts, reversals, and even hidden support and resistance levels. It was as if the market was speaking to me through colors, and I was becoming fluent in this unique language.
📌Advanced Features I Love in TradingView Heatmaps
TradingView heatmaps are not just visually appealing; they are packed with advanced features that cater to the diverse needs of traders. Here, I’ll highlight four advanced features that I particularly love and find incredibly useful in my trading journey.
📍Real-Time Data Updates
One of the standout features of TradingView heatmaps is their real-time data update capability. In the fast-paced world of trading, having access to the most current information is crucial. The heatmap updates continuously, reflecting changes in the market instantaneously. This feature ensures that I’m always making decisions based on the latest market movements, a critical aspect for day traders and those who rely on timing the market accurately.
📍Customizable Filters
The ability to customize filters in the heatmap is a game-changer. This feature allows me to tailor the data I see based on specific criteria like market capitalization, sector, industry, and more. For instance, if I want to focus on technology stocks or exclude small-cap stocks, I can easily set these filters. This level of customization helps in focusing my analysis on segments that align with my trading strategies, making the heatmap an incredibly flexible tool.
📍Detailed Tooltip Information
When hovering over a particular stock or sector in the heatmap, a tooltip pops up, providing detailed information. This feature includes data like the stock’s current price, the percentage change, and volume traded. For a deeper analysis, some heatmaps also provide additional data like P/E ratio, market cap, and 52-week high/low. This on-the-fly detailed information is invaluable for making quick, informed decisions without needing to leave the heatmap interface.
📍Historical Data View
The ability to view historical data in the heatmap format is an excellent feature for conducting trend analysis and understanding historical market behaviors. I can look back at how specific stocks or sectors have performed over time, under different market conditions. This historical perspective is crucial for identifying patterns and trends that might not be apparent from just a current snapshot. It helps in developing a more comprehensive trading strategy that takes into account both historical and current market data.
⚠️Chapter 4: Customization and Alerts
TradingView’s heatmaps allowed me to customize my experience even further. I could set up alerts based on specific heatmap criteria, ensuring I never missed a potentially lucrative trade.
Whether it was a sudden surge in activity or a divergence from the norm, I had the power to tailor my alerts to my trading strategy. The ability to overlay indicators on the heatmap was another game-changer.
It allowed me to combine technical analysis with market sentiment, providing a holistic view of the market. This feature significantly enhanced my decision-making process, leading to more confident and informed trades.
📌Chapter 5: Evolving with the Market
Embracing Continuous Improvement
As a long-term user of TradingView’s heatmaps, I’ve witnessed the platform’s evolution, keeping pace with the changing landscape of the financial markets.
This chapter explores how the continual improvements and introduction of new features have enabled me to refine my trading strategies and adapt to shifting market conditions with greater ease.
📍Introduction of Advanced Market Indicators
- Volume Profile: This feature added a new dimension to my market analysis. The volume profile shows the amount of trading activity at different price levels. It helped me identify key support and resistance areas, where significant buying or selling occurred.
- Order Book Data: Integrating order book data into the heatmap provided a real-time view of buy and sell orders in the market. This insight into market depth was crucial for understanding potential price movements and making more informed entry or exit decisions.
📍Enhanced Customization and Filtering
- Sector-Specific Heatmaps: As the market evolved, so did my need for more specific analysis. TradingView responded by enabling the creation of heatmaps focused on specific sectors. This allowed me to concentrate on sectors that align with my trading interests or the current economic cycle.
- Custom Filter Options: The ability to create custom filters based on criteria like market cap, earnings, dividend yield, and more, helped me focus on stocks that meet my investment criteria, making the process more efficient and targeted.
📍Integration with Broader Market Analysis Tools
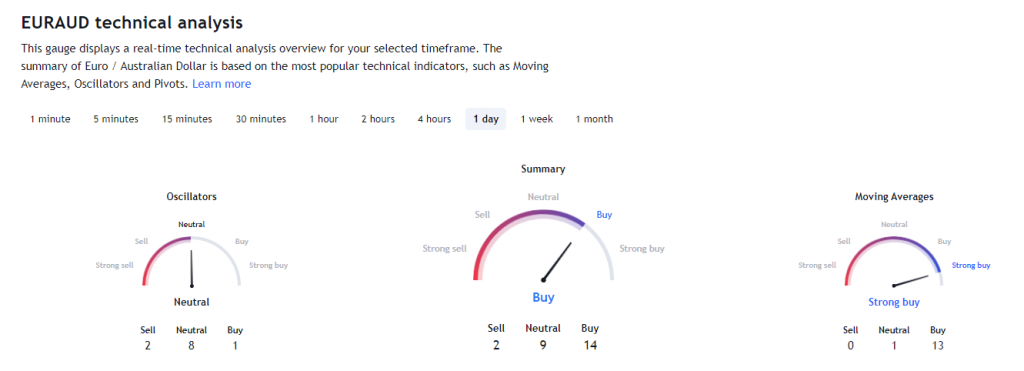
- Connecting with Technical Analysis Tools: TradingView integrated heatmaps with other technical analysis tools on their platform, allowing me to correlate heatmap data with technical indicators for a more comprehensive analysis.
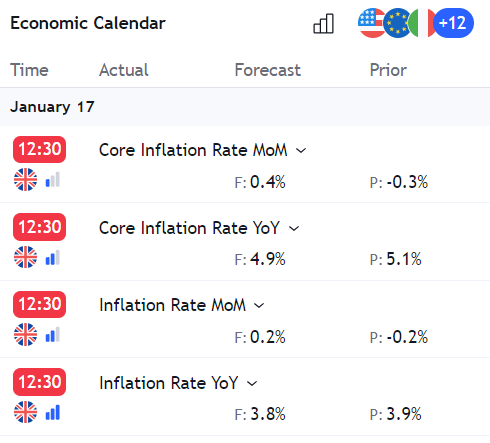
- Linkage to News and Economic Data: The ability to view relevant news and economic data alongside the heatmap enriched my understanding of why certain sectors or stocks were performing in a particular way.
🔥Chapter 6: Conclusion
Today, after years of using TradingView’s heatmaps, I can confidently say that they have been instrumental in my trading success. From a novice trader struggling to make sense of the markets, I have evolved into a confident and informed trader, thanks in large part to this incredible tool.
TradingView’s heatmaps have not only made my trading journey more profitable but also more enjoyable. They have transformed the way I approach the markets, providing me with a unique perspective that sets me apart from the crowd.
If you’re new to TradingView or have yet to explore its heatmap feature, I highly recommend trying it. It’s a tool that can revolutionize your trading experience, just as it did for me. Embrace the power of colors, customization, and market insights, and embark on your journey to trading success with TradingView’s heatmaps. Happy trading!